

_____________________________________________________________________________
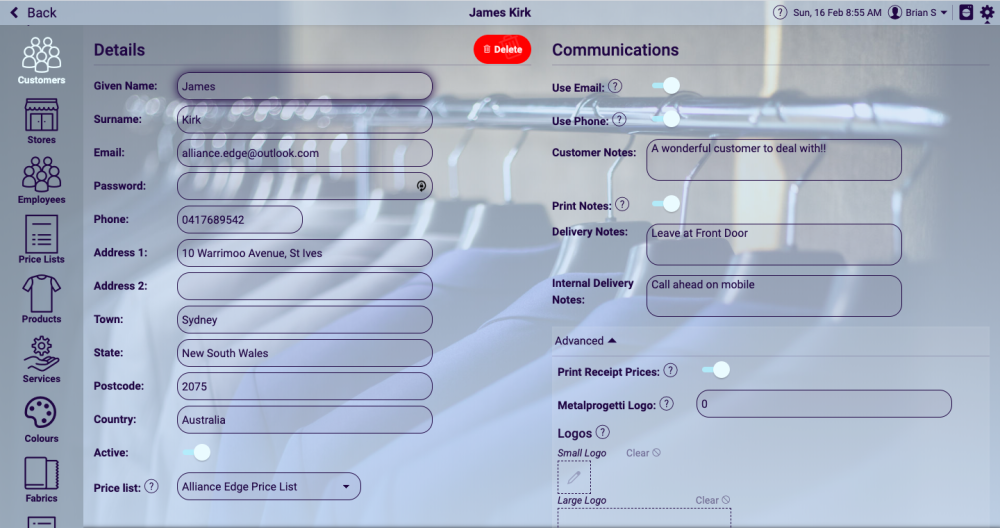
You can add a customer and choose the price list that this customer uses. You can also have a different logo print for this customer.
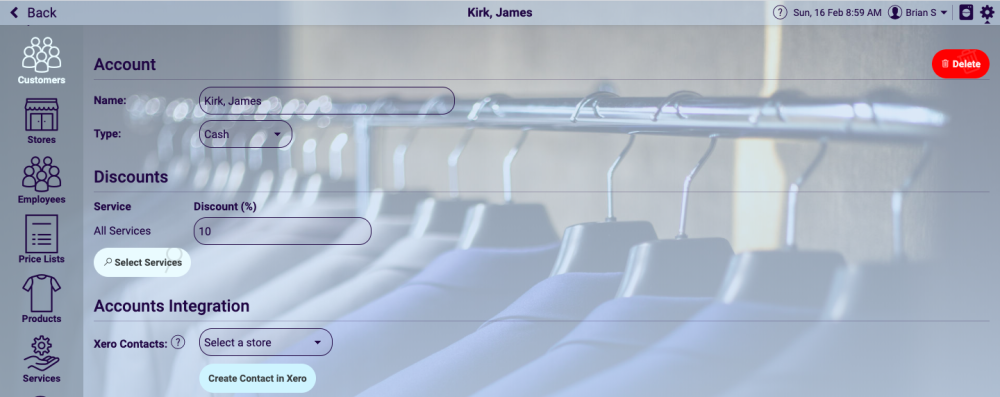
The customer can have its own personal notes and you can elect to print the notes. You can also setup discounts for this customer as a Ticket discount if they are a Cash account (They pay for each order when they pick up.
There are preferences you can turn on or off as to what you print on the customers receipt. Show prices or totals
You can setup customer notes to display or print and you can setup Driver notes eg. gate code 2233, Delivery Notes – delivery to back porch and also set a pricelist for this customer if they have their own pricing structure different to the stores
The account down below also has a priclist setting – so if you change the customers price list please remember to check the pricelist in the account section at the bottom of the screen that you have also updated the account pricelist
You can also add sub accounts to the account. (Family members or a business team members) When you choose the custtomer it will prompt you with a list of sub accounts and you can book the order in under the sub account.
As shown below, you can also set them as an Account Receivable customer (Add Account) and link them to Xero Accounting and set the tickets to transfer to Xero automatically when they are writing or per batch. You can set the MyCleanPOS customer to link to an existing Xero account or let MyCleanPOS add the account in Xero for you by pressing Create Account. (To setup Xero you need to do this in the Store setup function and then Setup the Customer in the Accounts area at the bottom of the customer screen.
Metalprogetti ARM – this will determine which arm on the assembly unit this customer will come off on. If you have an assembly where you have 2 arms that Bag orders and 2 arms that do not bag orders, you can set the customer to come off on the non bagged arms.
If you want the customers orders to be spread over the two non bagged arms then you need to setup a grouping eg. 9100 or 9200 – 9100 could be arm 1 or 2 and 9200 could be arm 3 or 4. If you want that customer to always come of arm 3 then enter 003 in the field. If you want this customer to come off arm 4 then enter 004 into the field.
1. On PCS DRIC field for arms define group 91 and 92
3. To activate it you need to set Mag.Par3 = 2. And this parameter
If you want to disable SPLIT need to set PAR3= 0 and Wait T Cmd for unload = 0 as well
Post your comment on this topic.